Nothing beats the comforting taste of classic homemade treats. These delightful baked goods feature a perfect balance of crisp edges and tender centers, making them a favorite for any occasion. Whether you’re preparing for holidays, creating thoughtful gifts, or simply craving a sweet snack, this method delivers consistent results every time.
With just a handful of ingredients and minimal prep, even beginners can master this crowd-pleaser. Techniques from trusted bakers like John Kanell ensure professional-quality texture and flavor. Plus, the dough freezes well, allowing you to bake fresh batches whenever the mood strikes.
Key Takeaways
- Simple preparation with 6-8 common ingredients
- Versatile for piping, slicing, or cookie presses
- Freezer-friendly dough for make-ahead convenience
- Tested techniques guarantee perfect texture
- Ideal for gifting or seasonal celebrations
Why This Butter Cookie Recipe Works
Professional bakers rely on precise techniques for bakery-quality results. This method combines science and tradition, earning a 4.97-star average from over 1,500 reviews. Every detail, from ingredient ratios to chilling time, is optimized for consistency.
Crisp Edges, Chewy Centers: The Science
Chilling the dough is the game-changer. Cold fat melts slower in the oven, preventing excessive spreading. This creates a golden exterior with a tender middle—best of both worlds.
John Kanell’s tested approach intensifies flavor while locking in moisture. Compared to traditional shortbread, these treats stay softer longer thanks to a hint of egg yolk.
Simple Ingredients, Big Impact
Quality vanilla extract elevates the taste dramatically. Preppy Kitchen’s recommendation? Splurge on pure extract for aromatic depth. Combined with room temperature butter, it ensures even mixing and rich texture.
- Yields 48 servings at just 102 calories each
- Adaptable: Bake immediately for crispier results or chill for chewiness
- Freezer-friendly dough lets you make butter-based treats anytime
Ready to jump recipe success? The next section breaks down must-have ingredients.
Essential Ingredients for Butter Cookies
Quality ingredients transform simple dough into something extraordinary. Each component plays a critical role in texture, flavor, and structure. Let’s break down the must-haves for foolproof results.

Unsalted Butter (Room Temperature)
227g of unsalted butter (about 1 cup) creates ideal richness. Ensure it’s between 65–68°F—soft enough to cream but still cool. Cold fat won’t incorporate properly, while melted butter leads to flat results.
Brands like Kerrygold offer higher fat content for extra tenderness. Store-brand options work, but European-style butters elevate flavor.
Vanilla Extract and Sugar: The Flavor Duo
Pure vanilla extract (2 tsp) adds aromatic depth. Avoid imitation versions—they lack complexity. Pair it with granulated sugar for crisp edges or powdered sugar for a melt-in-your-mouth feel.
- Granulated sugar: Creates slight crunch and spread.
- Powdered sugar: Yields denser, softer texture.
The Role of Egg Yolks in Texture
Egg yolks provide emulsification without drying out the dough. Their fat content (vs. whole eggs) ensures a tender crumb. For extra richness, add an extra yolk—just avoid overmixing.
Measure 240g flour using the spoon-and-level method. Packing it down leads to tough results. A pinch of salt balances sweetness and enhances flavors.
Step-by-Step Instructions
Mastering the perfect texture starts with precise techniques. Each step—from creaming to chilling—ensures a tender crumb and golden edges. Avoid shortcuts for bakery-worthy results.
How to Cream Properly
Use a stand mixer with the paddle attachment for even blending. Beat room-temperature butter and sugar for 2–3 minutes until fluffy. Pro tip: Scrape the bowl edges to prevent uneven mixing.
Add egg yolks one at a time, blending fully after each. The mixture should ribbon off the beater—this traps air for lift.
Mixing Dry Ingredients
Fold flour in three batches using a spatula. Overmixing develops gluten, leading to toughness. Stop when streaks disappear. For accuracy, weigh flour (240g) instead of measuring by volume.
| Mixing Method | Best For | Time |
|---|---|---|
| Stand Mixer | Large batches | 2 min |
| Hand Mixer | Smaller portions | 3 min |
| By Hand | Control | 4 min |
Chilling: The Game-Changer
Refrigerate cookie dough for at least 1 hour. Cold fat melts slower, preventing flat treats. Shortcut: Freeze for 20 minutes if pressed for time. Shape dough into logs, disks, or pipe before chilling.
Sticky dough? Dust hands with flour or chill longer. Properly rested dough holds intricate shapes and bakes evenly.
Baking Tips for Perfect Cookies
Small adjustments during baking can dramatically improve your final product. Whether you prefer chewy centers or crisp edges, these professional techniques ensure consistent results every time.

Parchment Paper vs. Silicone Mats
Parchment paper conducts heat evenly while preventing sticking—ideal for golden bottoms. Silicone mats offer reusability but may slightly insulate the baking sheet, extending bake time by 1-2 minutes.
For best results at 350°F, use parchment when precision matters. Rotate pans halfway through cooking to combat oven hot spots.
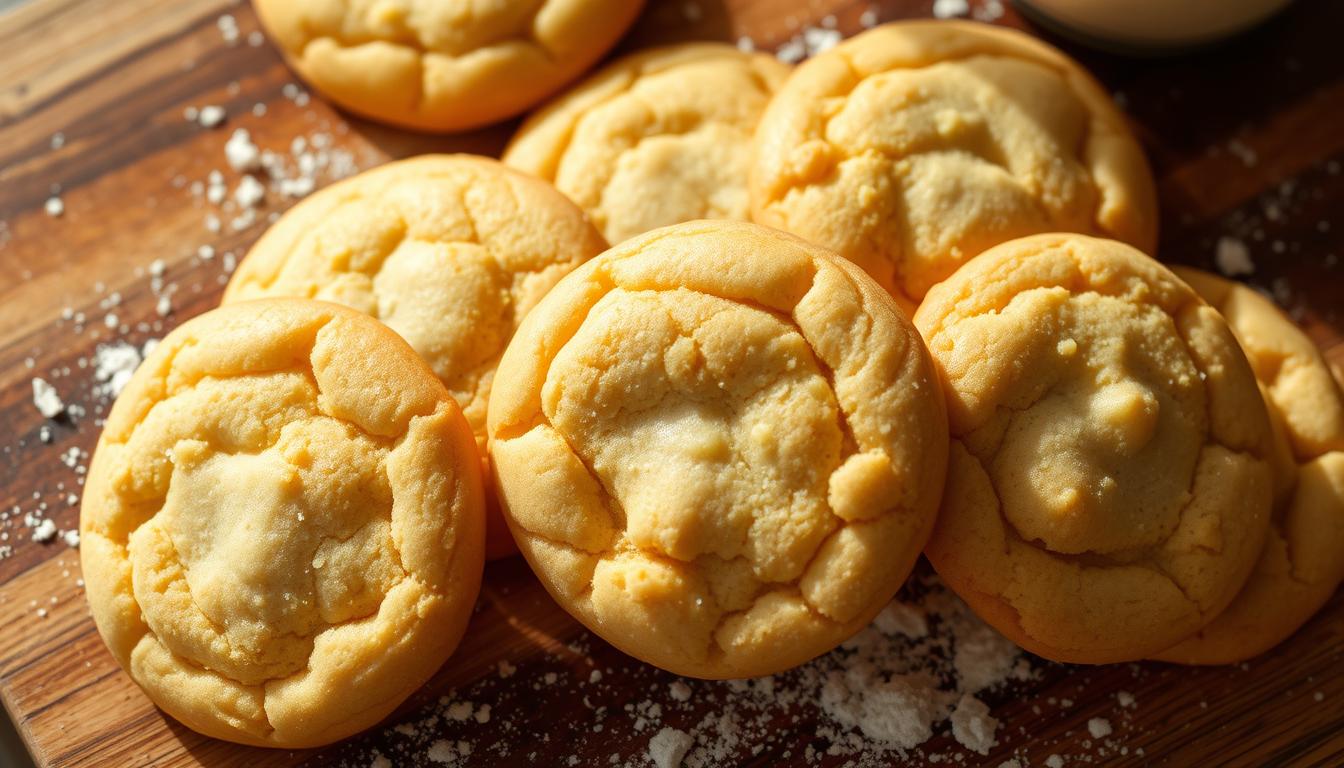
Spotting the Perfect Doneness
Look for edges turning light gold while centers appear slightly soft. “They’ll firm up during cooling,” notes test kitchen expert Sarah Phillips. Remove from the oven when the surface loses its shine—about 10-12 minutes for standard batches.
Customizing Texture
Prefer softer treats? Reduce bake time by 1 minute and let rest on the baking sheet for 2 minutes before transferring. For extra crispness, extend baking by 90 seconds and cool directly on a rack.
- High-altitude tip: Increase temperature by 15°F and reduce sugar slightly
- Always preheat for 20+ minutes—ovens cycle heat inconsistently when cold
- Space dough 2″ apart on parchment paper-lined sheets for even airflow
Creative Variations to Try
Elevate your baking game with endless creative twists on a classic favorite. From elegant drizzles to vibrant sugars, these ideas add flair without complicating the process. Perfect for holidays or gifting, they’ll make your treats unforgettable.
Chocolate Drizzle or Dip
For a glossy finish, temper chocolate by melting it slowly (use 60% dark for balance). Dip half of each treat or drizzle freely with a piping bag fitted with an open star tip (Ateco #827 recommended).
Pro tip: Add 40g cream to melted chocolate for smoother piping. Freeze-dried raspberry powder stirred into white chocolate creates a tangy contrast.
Almond Extract Swap
Replace vanilla with almond extract for a nutty depth—use half the amount, as it’s more potent. Pair with citrus zest or cardamom for layered flavor. “A 1:2 ratio (almond to vanilla) avoids overpowering,” advises pastry chef Emma Fontaine.
Rolling in Sanding Sugar
Create sparkle by coating dough logs in sanding sugar before slicing. For holiday hues, mix granulated sugar with food coloring and let it dry. Avoid nonpareils—they burn easily.
| Decorating Sugar | Best Use | Tip |
|---|---|---|
| Sanding Sugar | Edges or full coating | Press gently to adhere |
| Pearl Dragees | Center accents | Not for kids (hard texture) |
| Colored Sprinkles | Pre-bake topping | Mix sizes for dimension |
Experiment with marbled dough: Divide batches, tint with gel food coloring, and twist before chilling. An open star piping bag creates bakery-worthy swirls for special occasions.
How to Store Butter Cookies
Proper storage keeps your baked goods fresh and flavorful for days. Whether you’re saving leftovers or prepping dough for future use, these methods preserve texture and taste.
Keeping Treats at Room Temperature
Use an airtight container with a tight-sealing lid for countertop storage. Glass or food-grade plastic works best—both prevent moisture loss and odor absorption.
Layer delicate items with parchment or wax paper between them. For extra protection against humidity, add a silica gel packet to your airtight container.
- Glass jars: Ideal for visibility and odor protection
- Plastic bins: Lightweight option for large batches
- Cookie tins: Traditional choice with nostalgic appeal
Freezing for Future Enjoyment
Freezing dough extends its lifespan up to 3 months. Shape into logs or portion balls before chilling—this lets you bake small batches as needed.
Wrap dough tightly in plastic, then place in freezer bags. For pre-sliced portions, separate layers with parchment in an airtight container.
“Vacuum sealing removes air pockets that cause freezer burn—ideal for long-term storage.”
Reviving and Thawing Tips
Thaw frozen dough overnight in the refrigerator for even softening. If treats become stale, revive them with a quick oven warm-up or a splash of milk in an airtight bag.
For shipping, cushion items with bubble wrap and use rigid containers. Always label frozen dough with dates for best quality tracking.
Common Mistakes to Avoid
Even experienced bakers can stumble on simple errors that affect texture and taste. While the process seems straightforward, small missteps with ingredients or techniques lead to disappointing results. Let’s troubleshoot the most frequent issues and their easy fixes.
The Flour Measurement Trap
Overmeasuring flour ranks as the #1 error, causing dense, dry results. Studies show 15% of home bakers add too much by scooping directly from the bag. This packs down the flour, adding excess weight.
Use the spoon-and-level method for accuracy:
- Fluff the flour in its container with a fork
- Gently spoon into measuring cups
- Level off with a straight edge
Salvage over-floured dough by kneading in 1 tsp milk at a time until pliable. For precision, weigh ingredients—240g flour equals 2 cups when measured correctly.
Butter Temperature Matters
Using cold butter sugar mixtures won’t cream properly, while melted fat causes excessive spreading. The ideal consistency? Your finger should leave a slight indentation without sinking through.
“Microwave cold butter in 5-second bursts, flipping between each, for perfect softening.”
Sync all ingredient temperatures—cold eggs chill the butter, creating lumps. If pressed for time, warm eggs in a bowl of lukewarm water for 5 minutes.
Additional Pitfalls
Oven preheating ensures even baking—skip this and treats spread unevenly. Confusing baking powder with soda also causes texture issues. Remember:
- Baking powder contains salt and acid
- Soda needs acidic ingredients to activate
- Overmixing develops tough gluten strands
Prevent sugar crystallization by dissolving grains fully during creaming. These small adjustments guarantee professional-quality results every time.
Conclusion
Transform your baking routine with these foolproof techniques. Perfectly crisp edges and tender centers come down to two secrets: proper creaming and chilled dough. Master these, and every batch turns out flawless.
Make it your own! Swap vanilla for almond extract, add citrus zest, or drizzle with chocolate. These treats shine as gifts—package them in festive boxes or share snaps tagged #preppykitchen.
At just 102 calories per serving, they fit any lifestyle. Pair with coffee or tea for a cozy moment. Double the batch and freeze half for fresh-baked goodness anytime.
Craving more? Try our shortbread or sugar cookies next. Happy baking!