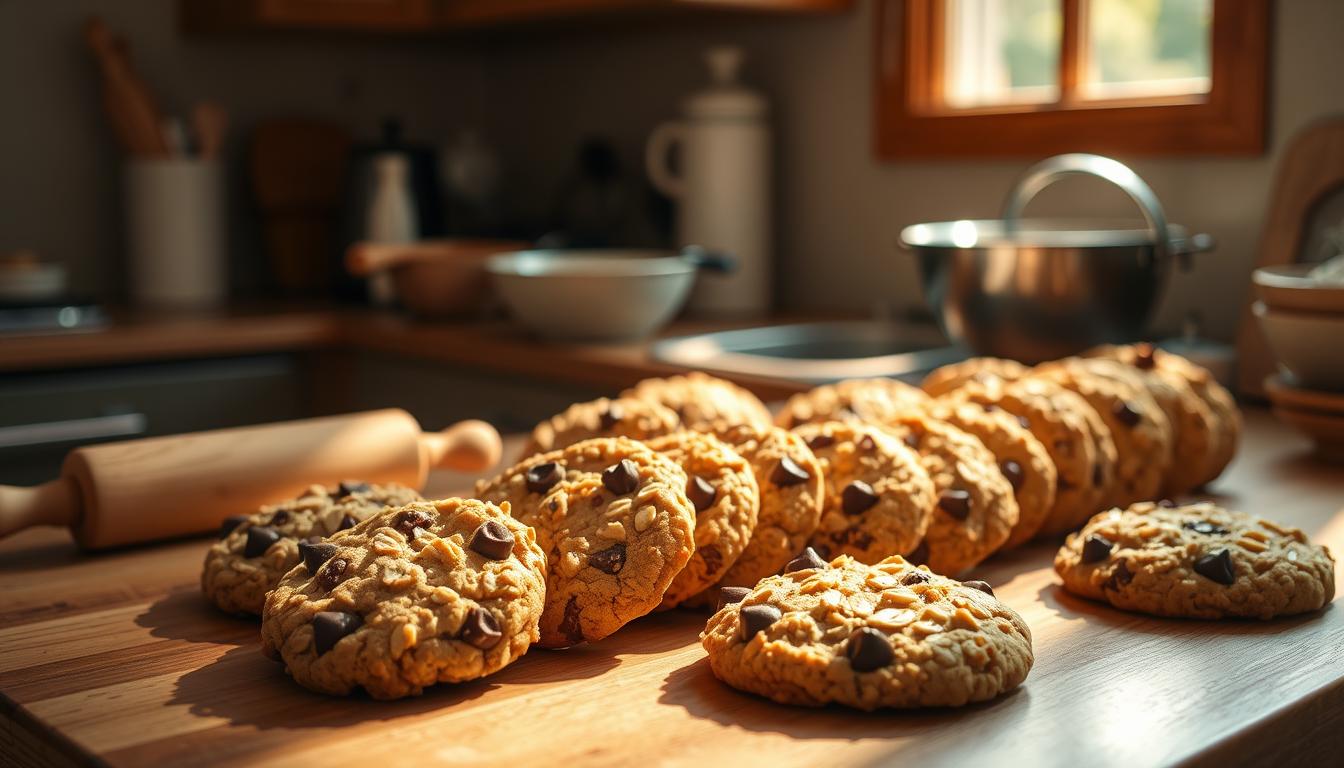
Craving something sweet but short on time? This homemade treat comes together in just 18 minutes—no mixer or chilling required. With a 4.97-star rating from over 1,800 reviews, it’s a tried-and-true favorite.
One bowl is all you need for minimal cleanup. Customize with chocolate chips, M&Ms, or sprinkles for endless fun. The simplicity and versatility make it perfect for last-minute cravings or impromptu gatherings.
Shared over 120,000 times, this crowd-pleaser delivers soft, chewy results every time. Whether you’re a beginner or a seasoned baker, it’s a foolproof way to satisfy any sweet tooth.
Key Takeaways
- Ready in under 20 minutes with no special equipment
- Rated nearly 5 stars by thousands of bakers
- Uses just one bowl for easy cleanup
- Adaptable with mix-ins like candy or chocolate
- Viral hit with over 120K shares online
Why This Easy Cookie Recipe Is a Must-Try
Want homemade treats without the hassle? This cookie recipe skips the fuss—no chilling, no mixer, just one bowl. Over 100,000 bakers swear by its simplicity, earning it thousands of glowing reviews.
“Easiest and most delicious I’ve tried!” raves one home baker. Unlike complex methods, this version delivers perfect results every time. Melted butter creates a chewy center, while mix-ins like chocolate chips add personal flair.
Three reasons it stands out:
- Speed: Ready in under 20 minutes, ideal for sudden cravings.
- Simplicity: Few ingredients, minimal cleanup.
- Adaptability: Swap add-ins to match your mood.
Pinterest fans love its reliability. One comment reads, “My kids devoured them—no leftovers!” Adapted from Pinch of Yum, this method proves baking can be stress-free and rewarding.
Gathering Your Ingredients
Great ingredients make great cookies—start with quality basics. Whether you’re a beginner or a pro, precise measurements and fresh items ensure success.
Essential Ingredients for Perfect Cookies
Use butter (salted or unsalted) melted to 90% for ideal texture. Whisk the remaining 10% in to avoid overheating. For chewiness, combine ½ cup brown sugar with ¼ cup granulated.
Measure flour by spooning it into a cup—not scooping—to prevent dense results. A kitchen scale helps (6.75 oz is perfect). Vanilla bean paste adds depth, but extract works too.
Optional Add-Ins for Extra Flavor
Customize with these mix-ins:
- Chocolate chips, chopped bars, or M&Ms
- Toasted nuts like walnuts or pecans
- Dried fruit or coconut flakes
Swap options based on preference. One tester noted, “Chopped dark chocolate took these to the next level!”
Preparing Your Kitchen Tools
The right tools make baking effortless and enjoyable. Start with a microwave-safe bowl for melting butter and a silicone spatula to scrape every bit of dough. These basics save time and minimize mess.
For even baking, use parchment paper or a silicone mat. Parchment prevents sticking, while mats offer reusable convenience. Testers note parchment gives a crispier edge, perfect for chewy centers.
A cookie scoop ensures uniform portions. A #40 size (1.5 tbsp) balances thickness and spread. One baker shared, “Consistent sizing means no underbaked middles!”
If using a mixer, a hand-held works for small batches. Stand mixers handle larger quantities but aren’t essential. Whisking by hand builds control over texture.
Prep checklist:
- Rimmed baking sheets to catch spills
- Oven thermometer for accurate temps
- Cooling racks to prevent soggy bottoms
Short on space? Nest bowls inside mixing tools. Store mats rolled vertically. A compact setup keeps your workflow smooth.
Step-by-Step Cookie Dough Preparation
Perfect dough starts with precision—here’s how to nail every step. Follow this sequence for a balanced texture and rich flavor.
Melting the Butter Just Right
Microwave butter in 10-second bursts, stirring between each. At 40 seconds, check with an infrared thermometer—it should read 90°F-95°F. “Residual heat finishes melting without scorching,” advises a test kitchen pro.
Whisk in the remaining 10% cold butter to stabilize the mix. This prevents greasy dough and ensures even baking.
Mixing Wet and Dry Ingredients
Combine sugars first, then blend in eggs and vanilla extract. Undermixing here keeps the crumb tender. Sift dry ingredients separately to avoid lumps.
Key sequence:
- Fold dry mix into wet in 3 batches
- Stop when streaks of flour disappear
- Test consistency—it should ribbon off the spatula
Folding in Chocolate Chips
Use a gentle scoop-and-lift motion to distribute add-ins. Pressing too hard breaks chips and overworks the dough. For variety, try 70% chips mixed with 30% chunks.
Pro tip: Chill chips first to prevent melting during folding. This maintains defined pockets of chocolate in every bite.
Baking Your Cookies to Perfection
Achieving bakery-quality results at home starts with mastering oven techniques. Small details—like temperature accuracy and timing—make all the difference between underbaked and golden-brown success.
Preheating the Oven Correctly
Always preheat oven to 350°F (375°F for high-altitude baking). An oven thermometer ensures accuracy, as built-in gauges often run hot or cold. “A 15-minute preheat guarantees even heat distribution,” notes a test kitchen expert.
Determining the Perfect Bake Time
Set a timer for 7–10 bake minutes. Rotate pans halfway for uniform browning. Watch for these visual cues:
- Edges: Firm and lightly golden
- Centers: Puffy but not glossy
- Surface: Tiny cracks forming
| Baking Surface | Heat Conductivity | Best For |
|---|---|---|
| Baking Stone | High | Crispy bottoms |
| Regular Sheet | Medium | Chewy centers |
High-altitude bakers should reduce sugar by 1 tbsp and increase flour slightly. Cool sheets between batches to prevent spreading.
How to Know When Your Cookies Are Done
Mastering the perfect bake cookies requires knowing the right visual and tactile cues. Underbaking slightly ensures softness, as carryover heat firms them during cooling.
Look for golden edges with pale centers—this contrast signals ideal texture. Press lightly; a slight indentation should bounce back slowly. For precision, use a thermometer: 165°F–170°F internally means done.
First batches often reveal oven hotspots. Rotate pans midway and note uneven browning. If overbaked, revive them by placing a slice of bread in the storage container overnight—the moisture softens them.
Key doneness tests:
- Color: Edges deepen to amber; centers stay light.
- Touch: Firm rim with a tender middle.
- Time: 7–10 time minutes at 350°F, adjusting for altitude.
“Pull them when they look underdone—they’ll set perfectly off the tray,” advises a professional baker. Trust the process, and soon, you’ll nail the timing instinctively.
Cooling and Serving Your Cookies
Cooling and presentation transform good homemade treats into irresistible delights. Proper techniques ensure ideal texture, while creative serving elevates the experience.
Letting Cookies Cool Properly
Transfer baked goods to a wire rack immediately. Air circulation prevents soggy bottoms. Counter cooling works but may extend the process by 5–10 minutes.
For gooey centers, rest them for 30 minutes. Crisp lovers can reduce this to 15. Testers note, “A rack guarantees even firmness—no soft spots!”
| Method | Time | Best For |
|---|---|---|
| Wire Rack | 25–30 mins | Even cooling |
| Counter | 35–40 mins | Gentle setting |
Best Ways to Serve Fresh Cookies
Serve slightly warm to highlight flavors. Pair with cold milk for a classic combo. Garnish with flaky salt or powdered sugar for visual appeal.
Reheat in a 300°F oven for 2 minutes. Avoid microwaving, which can unevenly soften them. For gatherings, stack cookies in tiers or sandwich ice cream between two.
- Temperature: Warm (110°F) enhances chocolate melt.
- Storage: Keep airtight for up to 3 days.
- Garnishes: Drizzle caramel or sprinkle crushed nuts.
Storing Your Homemade Cookies
Keeping your baked goods fresh ensures every bite tastes just as good as the first. Proper storage methods maintain texture and flavor, whether you’re saving leftovers or prepping for future cravings.

Room Temperature Storage Tips
For short-term freshness, use an airtight container at room temperature. A single layer prevents sticking, while parchment paper between stacks protects delicate surfaces. Most batches stay perfect for up to 3 days this way.
Revive slightly stale treats with the bread slice trick. Place a piece of fresh bread in the container overnight—it transfers moisture without making them soggy. “This hack saved my overbaked batch!” shared one home baker.
Freezing Cookie Dough for Later
To freeze dough, scoop portions onto a tray and chill until firm. Transfer to freezer bags or vacuum-seal for longer shelf life. Pre-portioned balls bake straight from frozen—just add 1-2 extra bake minutes.
| Storage Method | Duration | Best Use Case |
|---|---|---|
| Freezer Bags | 1 month | Space-saving |
| Vacuum-Sealed | 3 months | Long-term storage |
Thaw frozen dough overnight in the fridge or 30 minutes on the counter. For emergency baking, microwave a single portion at 10% power for 15-second intervals until pliable.
Easy Cookie Recipe Variations
Spice up your baking routine with creative twists on classic favorites. Whether you’re catering to dietary needs or just craving something new, these variations keep your recipes exciting and fresh.
Beyond Chocolate Chip: Mix-In Ideas
Swap chocolate chip for unexpected textures and flavors. Crushed pretzels add salty crunch, while cereal like cornflakes brings lightness. Dried fruit, such as cranberries or apricots, offers chewy sweetness.
For holiday flair, try peppermint chunks or colored sugars. “Espresso powder deepens the flavor without overpowering,” suggests a baking blogger. Citrus zest—lemon or orange—brightens rich doughs.
Gluten-Free and Vegan Options
Measure-for-measure GF flour blends work seamlessly in most recipes. Oat flour is another nut-free alternative. For vegan batches, replace butter with coconut oil and use flaxseed gel (1 tbsp ground flax + 3 tbsp water per egg).
| Ingredient | Standard | Allergy-Friendly Swap |
|---|---|---|
| Flour | All-purpose | Almond or oat flour |
| Butter | Dairy | Sunflower seed butter |
Keto fans can blend almond flour with erythritol. Always test a single cookie first to adjust baking times—alternative flours often brown faster.
Troubleshooting Common Cookie Issues
Even experienced bakers face challenges when making treats at home. From excessive spreading to crumbly texture, small missteps can alter results. Below are fixes for two frequent problems—plus pro tips to prevent them.
Why Cookies Spread Too Much
Overly flat batches often trace back to butter temperature. Melted fully? Dough lacks structure. Cool to 85°F before mixing. “Room-temperature butter should dent slightly when pressed,” advises a pastry chef.
Baking soda freshness matters too. Expired? It won’t lift dough properly. Test by mixing ½ tsp with vinegar—fizz means it’s active. Dark pans also worsen spreading; light-colored sheets bake evenly.
How to Fix Dry or Crumbly Dough
Overmeasured flour is the usual culprit. Spoon it into cups—don’t scoop. For rescue, knead in 1 tsp milk or oil per cup of dough. Too late? Crumble over ice cream for a quick dessert.
| Issue | Cause | Fix |
|---|---|---|
| Spreading | Hot butter | Chill dough 15 mins |
| Dryness | Excess flour | Add fat in droplets |
For altitude adjustments, reduce sugar slightly. High elevations dry dough faster. Store unused portions wrapped tightly to lock in moisture.
Pro Tips for the Best Cookies Every Time
Unlock professional-level results with simple, actionable tips. Master bakers rely on precise techniques that elevate homemade treats from good to exceptional. These methods require no special equipment—just attention to detail.
Control your ingredients‘ temperature for ideal texture. Cold eggs (50°F) prevent greasy dough, while 90% melted butter ensures perfect spread. “The remaining 10% cold butter stabilizes the mixture,” notes a James Beard Award winner.
At high altitudes:
- Reduce sugar by 1 tbsp per cup
- Increase flour by 2 tbsp
- Add 1 extra tbsp liquid
- Bake at 375°F for same time
Double batches save effort without compromising quality. Portion dough balls onto trays, freeze solid, then transfer to bags. Bake straight from frozen—just add 90 seconds.
Reuse parchment paper 3-4 times if unstained. Flip sheets between batches for even heating. For showstopping finish, sprinkle flaky sea salt immediately after baking.
Weigh dry ingredients for foolproof results. A kitchen scale eliminates measuring inconsistencies that can alter your recipe‘s outcome. One tester reported, “My batches became identical once I switched to grams.”
Pairing Your Cookies with Drinks
Elevate your snack time with perfect drink pairings. The right beverage can highlight flavors and create delightful contrasts. From classic milk to bold wines, here’s how to match your treats.

For chocolate-loaded batches, try a dry red wine like Cabernet Sauvignon. The tannins balance sweetness. “A bite of dark chocolate with a sip of wine is heavenly,” says a sommelier.
Cold milk remains a timeless choice. The creaminess softens rich flavors. Try these combos:
- Warm cookies/cold milk: Temperature contrast enhances texture.
- Vanilla latte: Complements brown sugar notes.
- Oat milk: Adds nuttiness to gluten-free options.
Adults might prefer a stout beer with molasses-based treats. Dessert wines like Moscato pair well with fruity add-ins. Seasonal sips—peppermint cocoa or spiced cider—add holiday cheer.
Sharing Your Cookie Creations
Spread joy by presenting your homemade delights in creative ways. Whether gifting to friends or posting online, thoughtful presentation makes your treats unforgettable.
For social media, tag bakers using #HomemadeTreats and #BakingJoy. Morning light near windows creates the best food photos. Style with rustic boards and mismatched plates for warmth.
Gift-giving tips:
- Portion control: 3-4 treats per person at exchanges
- Printable tags: Add personal notes to free templates
- Shipping: Vacuum-seal with oxygen absorbers for freshness
Edible gifts like layered mix jars wow recipients. Include a print card with instructions. “The visual layers make it Instagram-worthy before baking,” says a food blogger.
Community events thrive on shareable recipes. For fundraisers, package singles in clear bags with ribbon. Bake sales move faster with sample plates and allergy labels.
Remember: Great presentation starts with love. Wrap treats in parchment with twine, or stack in tins with tissue. Your care shines through every detail.
Conclusion
The secret to irresistible treats lies in these five key steps: speed, minimal cleanup, adaptable flavors, precise baking, and proper storage. With over 120K shares, this method proves anyone can bake like a pro.
Don’t hesitate to experiment—swap chocolate for nuts or try gluten-free flour. Your creativity makes each batch unique. Share your creations online with #BakingJoy to inspire others.
Stay tuned for seasonal twists, like peppermint or spiced apple variations. Now, preheat your oven and bake with confidence. Every bite celebrates your effort!