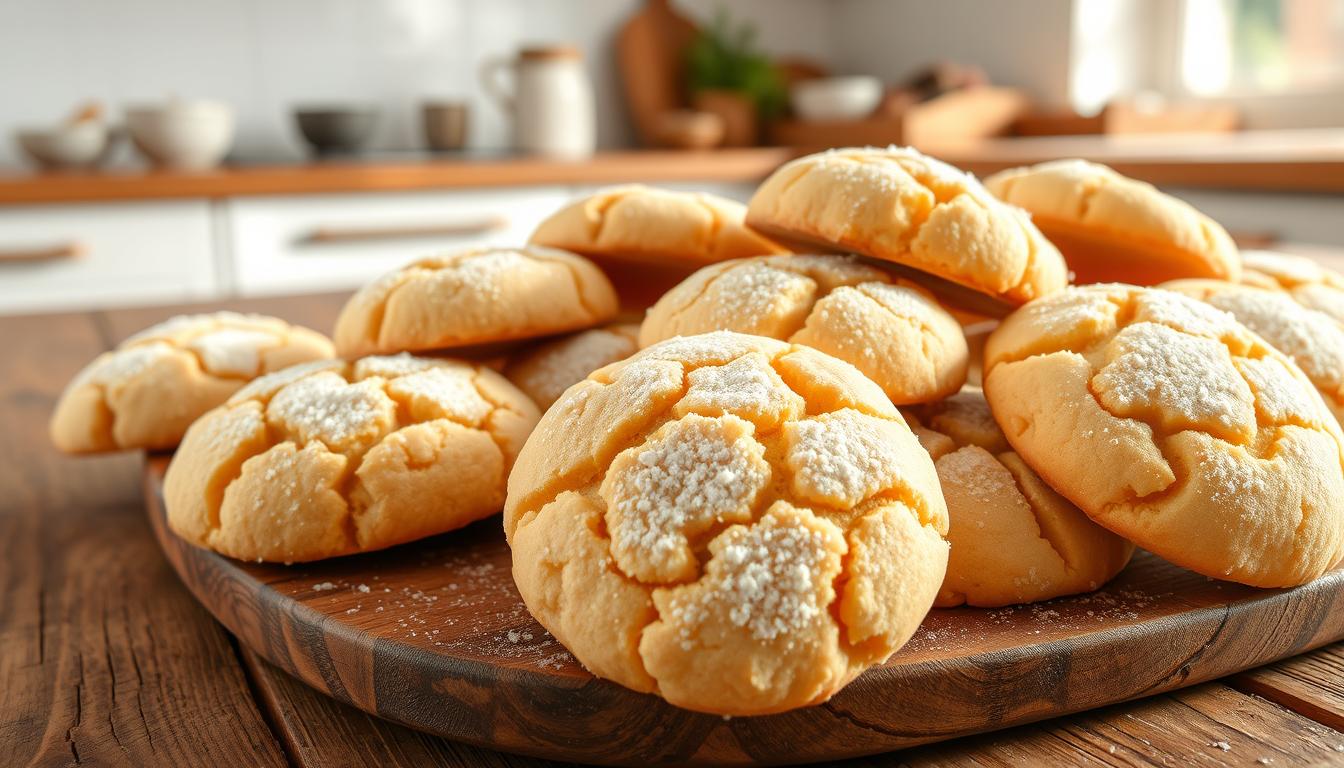
Craving delicious treats without the hassle? This gluten-free cookie recipe delivers perfection in every bite. After years of testing, we’ve crafted a version with chewy centers, crisp edges, and a rich brown butter flavor. No mixer is needed—just simple ingredients and easy steps.
Whether you prefer dairy-free or nut-free options, this recipe adapts effortlessly. Using trusted brands like King Arthur or Bob’s Red Mill flour ensures foolproof results every time. Plus, the dough freezes well, and a quick 30-minute rest is all it takes before baking.
Key Takeaways
- Perfectly balanced texture with chewy middles and crispy edges
- Rich brown butter flavor enhances every bite
- No mixer required—simple prep with pantry staples
- Flexible for dairy-free or nut-free dietary needs
- Freezer-friendly dough for quick baking anytime
Why This Gluten-Free Cookie Recipe Works
The secret to irresistible cookies lies in three key factors: perfect texture, rich flavor, and effortless prep. No fancy tools or hard-to-find ingredients are needed—just smart techniques.
Perfect Texture: Chewy Centers & Crisp Edges
Brown butter is the game-changer. When heated, its milk solids caramelize, adding nutty depth. Pair it with almond flour, which locks in moisture for a tender crumb.
Resting the dough matters. A 30-minute wait hydrates the flour, preventing grittiness. Compare the results:
| Dough State | Texture | Spread |
|---|---|---|
| Rested (30 min) | Chewy center, crisp edge | Minimal |
| Unrested | Dense, gritty | Excessive |
Rich Flavor from Brown Butter & Almond Flour
Browning butter unlocks 100+ new flavor compounds. It’s science: the Maillard reaction turns ordinary butter into a toasty, complex base. Almond flour amplifies this with its natural sweetness.
No Mixer Needed – Easy to Make
A rubber spatula does the job. Fold wet and dry ingredients gently to avoid toughness. For even baking, use a baking sheet with parchment paper—thick sheets prevent burnt bottoms.
Pro tip: Chill dough on the sheet before baking. This reduces spreading, keeping your chocolate chip cookies thick and chewy.
Essential Ingredients for Gluten-Free Cookies
Quality components transform ordinary treats into extraordinary delights. From flour blends to fats, each choice impacts texture and taste. Let’s break down the must-haves for foolproof results.
Gluten-Free Flour Blend with Xanthan Gum
Not all flour blends are equal. Brands like King Arthur’s Measure-for-Measure include xanthan gum, a binder that mimics gluten’s elasticity. For nut-free versions, Pillsbury’s blend works well with an extra ¼ cup of flour.
| Brand | Xanthan Gum? | Best For |
|---|---|---|
| King Arthur | Yes | Chewy texture |
| Bob’s Red Mill | No (add separately) | Nutty flavor |
| Pillsbury | Yes | Nut-free recipes |
“Xanthan gum prevents crumbly cookies by creating a flexible structure.”
Brown Butter vs. Regular Butter: What’s Better?
Browning butter unlocks deeper flavors. Heat it in a skillet until golden (350°F ideal). Regular butter works but lacks the caramelized richness. For dairy-free swaps, coconut oil adds moisture but reduces crispiness.
The Role of Almond Flour in Moisture
Almond flour retains moisture, ensuring tender bites. Substitute with oat flour if allergic, but add 1 tsp baking soda to balance density. Molasses (1 tbsp) can also boost chewiness in nut-free versions.
Pro tip: Weigh flour for accuracy—140g per cup avoids dry dough.
Tools You’ll Need
Precision in baking starts with quality equipment. The right tools ensure even baking, perfect portions, and easy cleanup. Here’s what to grab before you start.

Baking Sheets & Parchment Paper
Nordic Ware half-sheet pans are a top pick for even heat distribution. Aluminum sheets bake faster, while insulated ones prevent over-browning. Pair them with parchment paper for non-stick success.
| Sheet Type | Best For | Watch Out For |
|---|---|---|
| Aluminum | Crispy edges | Hot spots |
| Insulated | Even baking | Longer bake times |
Silicone mats work but reduce crispiness. For oven safety, avoid thin sheets that warp at high temps.
Cookie Scoop for Even Portions
A cookie scoop guarantees uniform size and baking time. OXO Good Grips offers reliable options:
- 1 tbsp for small treats
- 1.5 tbsp (ideal for most recipes)
- 2 tbsp for jumbo batches
Cool cookies on a wire rack to prevent soggy bottoms. For storage, Stasher bags keep dough fresh in the freezer for up to 3 months.
Step-by-Step Instructions
Mastering the perfect batch starts with precise techniques. Follow these steps for chewy centers, crisp edges, and deep flavor. No fancy tools—just patience and attention to detail.
How to Brown Butter Perfectly
Heat unsalted butter in a light-colored skillet over medium heat. Watch for three stages:
| Stage | Signs | Time |
|---|---|---|
| Foaming | Bubbles with a white froth | 2–3 minutes |
| Nutty Aroma | Golden color, toasted smell | 5–6 minutes |
| Done | Amber hue, brown specks | 7–8 minutes |
Remove from heat immediately to avoid burning. Cool slightly before using.
Mixing Dry and Wet Ingredients
Whisk dry ingredients (flour blend, baking soda, salt) in a bowl. In another bowl, combine brown butter, sugars, and eggs. Fold dry mix into wet with a spatula—no mixer required.
Tip: If dough feels thin, add 1–2 tbsp flour. Overmixing creates tough results.
Resting the Dough for Optimal Flavor
Let the dough rest 30 minutes minimum. Enzymes break down starches, enhancing sweetness. For thicker texture, chill 2 hours or freeze for later.
- 30-minute rest: Hydrates flour, reduces grittiness
- 2-hour chill: Extra chewiness, less spread
- 5-day fridge storage: Ideal for make-ahead batches
Baking Tips for Perfect Cookies
Achieving bakery-quality results at home depends on mastering oven techniques. Minor tweaks to heat and timing ensure chewy centers and crisp edges every time.
Oven Temperature and Timing
Always preheat oven to 350°F for even heat distribution. At this temperature, most batches bake perfectly in 10–12 minutes. For crispier results, try 375°F for 8–10 minutes.
| Temperature | Time | Result |
|---|---|---|
| 350°F | 10–12 min | Chewy center, light golden edges |
| 375°F | 8–10 min | Thinner, crispier texture |
Calibrate your oven with a standalone thermometer. Home ovens often run 25°F hotter or cooler than displayed.
How to Tell When Cookies Are Done
Look for golden edges with slightly soft centers. The windowpane test works best: press gently—if the center springs back, they’re ready. Residual heat continues cooking during cooling (carryover cooking).
For convection ovens, reduce temperature by 25°F and check 2 minutes early. Troubleshooting tips:
- Pale centers? Oven too cold or dough too cold.
- Overbrowning? Use light-colored baking sheets.
Dairy-Free and Nut-Free Variations
Adapting recipes for dietary needs doesn’t mean sacrificing flavor. Simple swaps ensure everyone enjoys chewy, rich treats—no allergens required.
Vegan Butter Substitutions
Plant-based butters vary in melt points and flavor. Miyoko’s European-Style melts like dairy butter, while Country Crock adds a subtle sweetness. For best results:
- Miyoko’s: Best for caramelized edges (high fat content).
- Country Crock: Lighter taste, ideal for softer textures.
Skip coconut oil—it lacks binding power and alters crispiness.
Swapping Almond Flour for Extra GF Flour
Nut-free? Replace almond flour with ¼ cup extra gluten-free blend (like King Arthur). Add 1 tsp baking soda to balance density. For binding, try:
“Flax eggs (1 tbsp ground flax + 3 tbsp water per egg) mimic traditional texture.”
| Ingredient | Substitution | Tip |
|---|---|---|
| Almond flour | GF blend + ¼ cup | Weigh for accuracy |
| Egg | Flax egg | Let sit 5 minutes to thicken |
Top with Enjoy Life chocolate chips—allergen-free and melt-perfect.
Common Mistakes to Avoid
Avoiding these pitfalls guarantees bakery-worthy results. Even minor errors—like overworking the batter or rushing the process—can alter texture and flavor. Here’s how to sidestep them.
Overmixing the Dough
Overmixing develops excess starch, leading to tough results. Fold dry and wet ingredients just until combined—about 30 strokes with a spatula. Look for no dry flour patches.
Pro tip: If the batter feels stiff, add 1 tsp milk. Gluten-free blends hydrate slower than wheat flour.
Skipping the Dough Rest Time
Resting lets flour absorb moisture, preventing grittiness. Compare these outcomes:
| Rest Time | Texture | Spread |
|---|---|---|
| 30 minutes | Chewy, even crumb | Controlled |
| None | Grainy, dense | Excessive |
“Warm dough spreads faster. Chill for thicker, softer cookies.”
For urgent batches, freeze scooped dough for 15 minutes before baking. Measure flour with the spoon-and-level method—packing it down skews ratios.
How to Store and Freeze Cookie Dough
Proper storage keeps dough fresh and ready for bake anytime. Whether prepping ahead or saving leftovers, these methods ensure perfect results.
Refrigerating vs. Freezing: Pros and Cons
Refrigeration (up to 5 days) preserves texture but limits shelf life. Freezing extends freshness for 3 months. Compare:
| Method | Duration | Best For |
|---|---|---|
| Fridge | 5 days | Quick batches |
| Freezer | 3 months | Long-term storage |
- Flash-freeze dough balls on parchment-lined sheets before transferring to a container.
- Souper Cubes trays portion dough evenly for single servings.
Baking from Frozen: Adjustments Needed
Skip thawing—bake frozen dough directly. Add 2–3 minutes to the usual time. For softer results, let dough sit at room temp for 10 minutes first.
“A chilled bag of dough means instant treats for unexpected guests.”
Tip: Label freezer bags with dates to track freshness.
Serving Suggestions
Elevate your dessert experience with these creative serving ideas. Whether enjoyed fresh from the oven or as part of a curated spread, these tips highlight texture and flavor contrasts.

Pairing with Milk or Coffee
Dark roast coffee intensifies the caramel notes in baked treats. For a creamier option, oat milk balances sweetness without overpowering. Match your brew to the occasion:
| Beverage | Best For | Flavor Boost |
|---|---|---|
| Espresso | After-dinner | Amplifies brown butter |
| Cold brew | Summer snacks | Subtle chocolate hints |
| Oat milk latte | Morning treats | Adds velvety texture |
Adding Flaky Salt for Extra Flavor
A sprinkle of Maldon sea salt just after baking enhances sweetness. The crystals adhere best when treats are warm. For artisanal flair, press chocolate shards into the dough pre-bake.
Pro tips for salt application:
- Use fingertips for even distribution.
- Combine with coarse sugar for crunch.
“Salt isn’t just seasoning—it’s a spotlight for flavor.”
Dessert Charcuterie & Gifting Ideas
Create a dessert board with varied textures: crisp edges, chewy centers, and melted chocolate drizzles. For gifts, layer treats between wax paper in airtight tins to preserve freshness.
Nutritional Information
Smart bakers know that great taste pairs with mindful nutrition. Whether tracking macros or managing dietary needs, understanding values ensures guilt-free enjoyment.
Calories and Macros per Serving
One treat averages 184kcal—balanced with 12g fat, 2g protein, and 18g sugar. Swapping flour blends lowers calories to 118kcal per serving.
Key variations:
- Diabetic-friendly: Replace sugar with monk fruit (0 glycemic impact).
- High-fiber: GF blends like King Arthur add 3g fiber per serving.
- Low-fat: Use applesauce instead of butter (reduces fat by 50%).
“Always check labels for allergen warnings—FDA requires clear wheat/nut disclosures.”
For stable energy, opt for flours with a low glycemic index (e.g., coconut flour). Pair treats with protein-rich snacks to balance blood sugar spikes.
Conclusion
Readers rave about this tried-and-true method. Quality flour, proper resting, and precise oven temps ensure flawless results every time. Don’t hesitate to experiment—toss in pretzels or nuts for extra crunch.
Thousands of home bakers swear by this gluten-free cookie recipe. One commenter called it “the only one my family requests.” Follow this checklist for success:
- Weigh ingredients for accuracy
- Rest dough 30+ minutes
- Bake at 350°F for chewy centers
A personal favorite since 2012, these cookies never disappoint. Ready to wow your crowd? Preheat that oven!