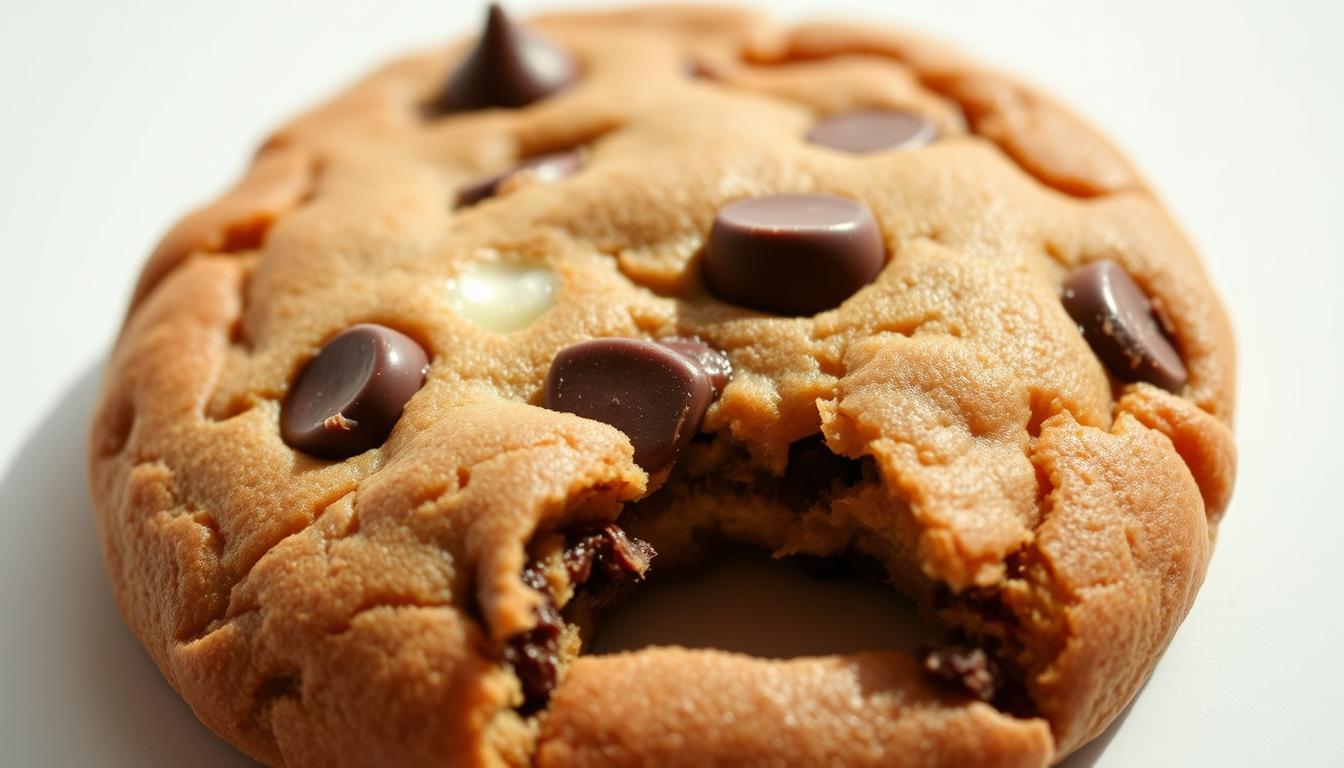
Few treats bring as much joy as warm, freshly baked cookies straight from the oven. This beloved dessert has won hearts worldwide, with its perfect balance of crispy edges and soft centers. The best part? No chilling is needed, making it ideal for spontaneous baking sessions.
With over 21 million page views, this tried-and-true method stands out for its simplicity and foolproof results. Melted butter ensures a rich flavor, while adaptable ingredients cater to various dietary needs. Whether for a weeknight treat or a special occasion, these cookies deliver every time.
Pro tips like measuring flour correctly and avoiding overmixing guarantee bakery-quality results. Ready to bake the ultimate crowd-pleaser? Let’s dive in!
Key Takeaways
- No chilling required for quick baking.
- Melted butter enhances flavor and texture.
- Adaptable for dietary preferences.
- Perfect for both casual and special occasions.
- Proper flour measurement prevents dense results.
Why This Chocolate Chip Cookie Recipe Stands Out
What makes these treats truly special is their foolproof method and rich flavor. Unlike traditional recipes, melted butter ensures a consistent dough texture—no guessing if your butter is at room temperature. This trick saves time and guarantees even baking.
Texture science plays a key role here. A mix of cornstarch and an extra egg yolk locks in moisture, creating that perfect chewiness. Meanwhile, a 2:1 ratio of brown to white sugar adds depth and keeps the centers soft.
| Method | Texture | Best For |
|---|---|---|
| Melted Butter | Dense, chewy | Quick baking |
| Creamed Butter | Lighter, airy | Fluffier results |
Time-strapped bakers will love the no-chill perk. But if you prefer thicker treats, chilling the dough for 30 minutes prevents overspreading. It’s all about flexibility.
Don’t just take our word for it. One baker shared, “These disappeared at my potluck—everyone asked for the recipe!” Another reviewer, Adrienne, praised the best chocolate chip texture: “Crispy outside, gooey inside—just like my grandma’s.”
Essential Ingredients for the Perfect Cookies
Great baking starts with quality ingredients—each one plays a vital role. Whether you’re a beginner or a pro, understanding how components interact ensures consistent results. Let’s break down the essentials.
Dry Ingredients You’ll Need
Brown sugar is the MVP for softness. Its molasses content locks in moisture, creating chewy centers. Pair it with granulated sugar for balanced sweetness and crisp edges.
Flour forms the base, but measure it right: spoon and level to avoid dense results. A pinch of salt enhances flavor, especially if using unsalted butter.
Wet Ingredients for Rich Flavor
Butter choices matter. Salted butter simplifies prep, but unsalted butter lets you control sodium. Melt it for a richer taste and easier mixing.
Room-temperature egg blends smoothly, while pure vanilla extract adds depth. Skip imitations—the real stuff makes a difference.
- Pro tip: Chill dough if you prefer thicker treats.
- Adjust salt if swapping butter types.
Must-Have Baking Tools
Professional results start with the right equipment. Quality tools streamline the process and ensure consistency, whether you’re a beginner or a seasoned baker.
Stand mixers save time and effort, blending ingredients evenly. For portion control, a medium cookie scoop guarantees uniform sizing. Don’t overlook an oven thermometer—it’s crucial for accurate temperature.
Parchment paper prevents sticking and promotes even browning, while silicone mats offer reusability. Choose based on preference: parchment for crispiness, mats for eco-friendly baking.
Always use a cooling rack. Transferring treats from the sheet to the rack stops sogginess by allowing air circulation. This step locks in texture and flavor.
Pro tip: Glass containers keep leftovers fresh longer. Store dough or baked goods in airtight conditions for maximum freshness.
Step-by-Step Chocolate Chip Cookie Recipe
Mastering the dough is the first step to bakery-worthy results. Follow these techniques to ensure a flawless base for your treats.
Preparing Your Dough
Start by combining melted butter and sugars until creamy. Add eggs one at a time, mixing just until incorporated. Overmixing here can lead to tough results.
Fold in dry ingredients gently—think stir until just combined. This prevents gluten overdevelopment, keeping the texture tender. For extra richness, hand-press 2 cups of chips into the dough.
Mixing Techniques for Perfect Texture
Use a spatula for even blending without overworking the dough. The ideal consistency? Right between wet and dry—slightly sticky but moldable.
Pro tip: Try these mix-in variations for flair:
- Chopped bars for rustic chunks
- Discs for even melting
- Nuts for crunch (optional)
Chilling is optional but recommended for thicker recipes. Room-temperature dough spreads more, creating crisp edges.
How to Shape Your Cookie Dough
Perfectly portioned dough ensures even baking and consistent results. The right technique transforms sticky mounds into uniform balls ready for the oven.

Use a medium scoop (about 50g) for precision. For thicker textures, roll dough into tall cylinders instead of rounds. This creates rustic edges and chewy centers.
Sticky dough? Lightly flour your palms or chill the mixture for 15 minutes. Cold dough holds its shape better and prevents overspreading.
- Portioning hack: 2–3 Tbsp scoops fit standard baking sheets.
- Flash-freeze extras on a tray for 30 minutes, then bag for later use.
Uniform sizing means no underbaked or overdone cookies. Now, they’re ready to bake!
Baking Your Cookies to Perfection
The final magic happens in the oven, where golden edges meet soft centers. A few degrees or minutes can shift your results from underdone to overbaked. Here’s how to strike the balance.
Optimal Oven Temperature and Time
Preheat to 350°F (175°C)—the sweet spot for even baking. Too hot, and edges burn before centers set. Too low, and treats spread into thin crisps.
Bake for 10–12 minutes. Rotate the tray halfway for uniform browning. Convection ovens? Reduce time by 1–2 minutes.
Signs Your Cookies Are Done
Look for lightly browned edges with pale, puffy centers. They’ll seem underbaked but firm up while cooling. Cracked surfaces? Perfect—that’s caramelization at work.
| Visual Cue | Meaning | Action |
|---|---|---|
| Golden edges, doughy center | Ideal texture | Remove from oven |
| Uniform golden color | Overbaked risk | Check early next batch |
Let treats rest on the tray for 5 minutes. Carryover heat finishes the job without drying them out. Transfer to a rack to cool completely.
The Secret to Soft and Chewy Cookies
The perfect balance of soft centers and crisp edges comes down to science. Brown sugar is the unsung hero—its molasses content traps moisture, keeping treats tender for days. Pair it with cornstarch and an extra egg yolk for a chewy texture that rivals professional bakeries.
Melted butter plays a dual role. It blends seamlessly into the dough, eliminating air pockets for a denser bite. Unlike creamed butter, which creates lift, this method ensures even browning and a richer flavor profile.
Chilling the dough isn’t just for patience. Cold dough spreads less, preserving thickness and chewiness. For recipes requiring immediate baking, reduce oven temperature by 25°F to mimic the effect.
- Pro tip: Replace 1 Tbsp flour with cornstarch for extra softness.
- Underbake slightly—residual heat finishes the job.
Want gooey centers? Fold in chip varieties that melt evenly, like discs or chopped bars. The right mix-ins elevate both flavor and mouthfeel.
Cooling and Storing Your Cookies
The journey to perfect treats doesn’t end when they leave the oven. Proper handling ensures they maintain that just-baked texture and flavor. Follow these professional techniques for optimal results.
Proper Cooling Techniques
Transfer baked goods to a wire rack immediately after removing from the oven. This stops the cooking process and prevents soggy bottoms. Let them sit at room temperature for at least 30 minutes before storing.
Resist the urge to stack warm treats—this traps steam and creates moisture. For crispier textures, leave them uncovered during cooling. Softer varieties benefit from loosely tented foil.
Best Storage Practices for Freshness
Use an airtight container with parchment layers between stacks. This prevents sticking while maintaining freshness. Glass containers outperform plastic for moisture control.
For longer preservation, freeze in a resealable bag with all air removed. Thaw at room temperature when ready to enjoy. Refresh stale batches by adding a bread slice to the container overnight.
| Storage Method | Duration | Best For |
|---|---|---|
| Room Temperature | 5 days | Immediate consumption |
| Freezer | 2 months | Long-term storage |
| Refrigerator | 3 weeks | Extended freshness |
Pro tip: Label containers with dates to track freshness. Separate different flavors to prevent flavor transfer during storage.
How to Freeze Cookie Dough for Later
Preserving dough for future baking sessions is a game-changer for busy home chefs. With proper techniques, you can maintain that fresh-from-the-oven quality for months.
Start by portioning the mixture into balls using a scoop. Place them on a parchment-lined tray, ensuring they don’t touch. Flash-freeze for 30 minutes until firm.
Transfer frozen portions to an airtight bag or container. Squeeze out excess air to prevent freezer burn. Label with the date—they’ll keep for 3 months.
When ready to bake, no thawing is needed. Just add 2-3 extra minutes to the usual time at 350°F. For softer results, thaw overnight in the fridge first.
- Pro tip: Freeze flat for faster thawing.
- Double-batch prep saves future effort.
Troubleshooting Common Cookie Issues
Even seasoned bakers encounter occasional mishaps—here’s how to fix them. From overspreading to crumbliness, small tweaks to your ingredients or techniques can save the batch. Let’s tackle the top two complaints.
Why Your Cookies Spread Too Much
Butter temperature is often the culprit. Melted butter spreads more than softened. For thicker results, chill the dough for 30 minutes before baking.
Too much flour? Measure by weight (6.75 oz/cup) or spoon-and-level. Overmixing also develops gluten, leading to flat treats. Fold dry ingredients gently.
Fixes for Dry or Crumbly Cookies
Overbaking or excess flour dries them out. Add 1–2 Tbsp milk to sticky dough. Brown sugar retains moisture—ensure you’re using enough.
- Pro tip: Replace 10% of flour with cornstarch for tenderness.
- Fold in extra chips or nuts to bind crumbly textures.
Variations to Try
Customizing your baked goods opens endless flavor possibilities. Whether you crave extra crunch or need allergy-friendly options, simple swaps create entirely new experiences. The base recipe adapts beautifully to creative twists.
Enhancing with Nuts and Mix-Ins
Toasted walnuts or pecans add earthy depth to sweet treats. For texture contrast, try pretzel pieces or shredded coconut. Always fold extras in last to prevent overmixing.
Sea salt flakes on top elevate flavors beautifully. A pinch in the dough balances sweetness too. For festive twists, colorful sprinkles or dried fruit work wonders.
Gluten-Free and Vegan Adaptations
Replace regular flour with 1:1 gluten-free blends for celiac-friendly versions. King Arthur’s mix performs particularly well, mimicking traditional texture.
Vegan bakers can use plant-based butter and flax eggs. Applesauce or aquafaba also bind ingredients without eggs. Miyoko’s cultured butter alternative adds rich flavor.
- Pro tip: Chill vegan dough longer—it spreads more when warm.
- Add 1 tsp xanthan gum per cup of GF flour for better structure.
Pairing Your Cookies with Drinks
The right beverage can transform your sweet creations into a memorable experience. Whether you prefer classic combos or adventurous matches, these pairings elevate every bite.
Cold milk remains the timeless partner for chocolate chip treats. Its creaminess balances sweetness while cleansing the palate. For warmer options, try hot cocoa or coffee—their rich flavors complement baked goods perfectly.
Adult gatherings often call for sophisticated matches. Bourbon’s caramel notes enhance buttery dough, while stout beer mirrors roasted flavors. Sea salt-topped varieties pair beautifully with dessert wines like Muscat.
Seasonal changes invite creative combinations. Winter calls for peppermint tea’s refreshing contrast. Summer favorites include iced lattes or fruity iced tea. The possibilities are endless when you experiment with flavors.
- Pro tip: Match intensity—bold drinks with rich treats, lighter beverages with delicate flavors
- Temperature matters: cold drinks with warm cookies create perfect contrast
- Consider texture: creamy drinks offset crunchy edges
Reader Success Stories
Nothing warms the heart like hearing how a simple recipe creates meaningful moments. From comfort food to kitchen triumphs, these stories showcase the power of homemade treats.
One reader shared how these treats became a lifeline: “After my miscarriage, a friend brought over a batch. That small act of kindness—warm cookies and quiet company—helped more than words ever could.”
Others celebrate baking wins against the odds. Leigh, a Colorado resident, adapted the recipe for high-altitude baking: “I added 2 Tbsp extra flour and reduced sugar slightly. Perfect results every time!”
- Dietary wins: Gluten-free bakers report success with 1:1 flour swaps
- Time-savers: Busy parents love freezing dough for last-minute treats
- Flavor twists: One family adds orange zest for holiday variations
These stories prove great baking isn’t just about technique—it’s about connection. Whether overcoming kitchen challenges or comforting loved ones, every batch tells a story.
Expert Tips from Professional Bakers
Professional bakers know the little tricks that turn good treats into great ones. Their secrets? Precision and patience. Here’s how to replicate their expertise at home.
Shape dough tall, not round. Sally’s hack: Roll portions into cylinders instead of balls. This creates thicker centers and rustic edges. For even baking, rotate pans halfway through—hot spots won’t stand a chance.
Lindsay’s golden rule: “Underbake and trust the process.” Pull cookies when centers look slightly wet. Residual heat finishes the job without drying them out. Perfect texture every time.
- Weigh ingredients—a kitchen scale ensures consistency (Source 1 & 3).
- Chill dough 30 minutes if it feels too soft.
- Use parchment paper for even browning.
These small adjustments separate home bakers from the pros. Now, go impress your crowd!
Frequently Asked Questions (Answered)
Got burning questions about perfecting your batch? We’ve got answers. Below, solve common hurdles with pro-tested fixes.

Why do my treats spread too much? Hot butter or overmixed dough are usual suspects. Chill portions for 30 minutes pre-baking. For high-altitude fixes, add 2 Tbsp extra flour.
| Issue | Cause | Fix |
|---|---|---|
| Flat cookies | Warm dough | Freeze scoops 15 mins |
| Crumbly texture | Overbaked | Reduce time by 2 mins |
How long do they stay fresh? Store in airtight containers for up to 5 days. Freeze baked goods for 2 months—thaw at room temp.
- Halving the recipe? Use 1 egg yolk (not whole egg) for balance.
- Egg-free? Swap with flax eggs (1 Tbsp ground flax + 3 Tbsp water).
- Reviving stale batches? Microwave with a damp paper towel for 10 seconds.
For chocolate lovers, try discs instead of chips—they melt evenly. Gluten-free? Use 1:1 flour blends with xanthan gum.
Conclusion
Baking these treats is more than following steps—it’s about creating moments. Precision with ingredients and attention to baking cues ensure perfection every time. Whether chewy or crisp, the joy comes from sharing them with others.
Turn batches into acts of kindness. A warm tray can brighten someone’s day or become a family tradition. Tag your creations with #PerfectCookieJourney to inspire fellow bakers.
Remember, great results start with patience and love. Now, go make memories—one delicious bite at a time!